Whether you’re just dreaming at this stage or ready to start swinging hammers, remodeling your kitchen is an exciting time! But it can also come with stress, headaches, and elevated blood pressure. Isn’t that true of any worthy pursuit? To ensure the success of your kitchen transformation, let’s go over some common mistakes that I see people make. In this article, we'll explore five mistakes to avoid during your kitchen remodel, including a critical Tucson-specific consideration, to help boost your confidence that your investment will bear the fruit you are hoping for - a kitchen that improves the quality of your life, is uniquely you, and causes zero future regrets.
Mistake 1: Overlooking Storage and Organization
Generally speaking, people want more storage, not less. Rarely do I hear, “yeah, we just have too much storage. I can’t stand it anymore!” One of the most common mistakes in kitchen remodeling is underestimating the importance of storage and organization. It's easy to focus on the big-ticket items like cabinets and countertops while overlooking the smaller details that contribute to efficient daily use. Spice racks, pull-outs, and other organizational features are often neglected but can significantly enhance the functionality and daily enjoyment of your kitchen.
My personal kitchen at home is a testament to this. I dream of a home where everything is perfectly organized. Maybe I just need a giant gift card to The Container Store…alas, I’m not there yet. But I have done a lot to maximize storage in my relatively tiny midtown Tucson kitchen. We have spice racks and pot racks and drawer organizers and pull-outs. Each one has made life in the kitchen dramatically better, and the best part is I get to be reminded of those little pleasures every single day.
When planning your remodel, take the time to assess your storage needs. Consider the items you use most frequently and how you can optimize space to keep them easily accessible. Investing in well-designed cabinets and drawers with built-in organizers can transform your kitchen into a clutter-free, efficient, and fun space!
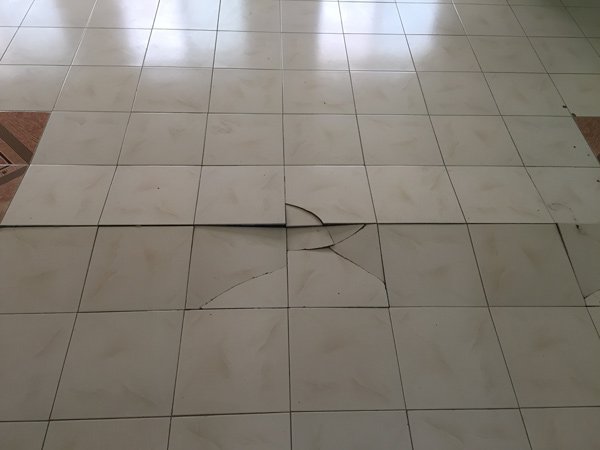
Mistake 2: Tile Floor Errors
In our dry Tucson climate, tile floors are a popular choice for kitchens. However, improper preparation and installation can lead to buckled floors. The most common tile installation mistake in Tucson is not including expansion joints. This is required by industry standards, but often missed, and can be very costly to rectify. To avoid this mistake, prioritize proper tile floor preparation and installation. This is not the place to skimp.
Ensure that your substrate is stable, clean, and level before laying tiles. Plan your layout and identify where the expansion joints need to go. Hiring a skilled professional for the installation is highly advisable. Taking these precautions will not only prevent buckling but also ensure the longevity and aesthetic appeal of your kitchen floor.
Mistake 3: Missing Creative Layout Opportunities
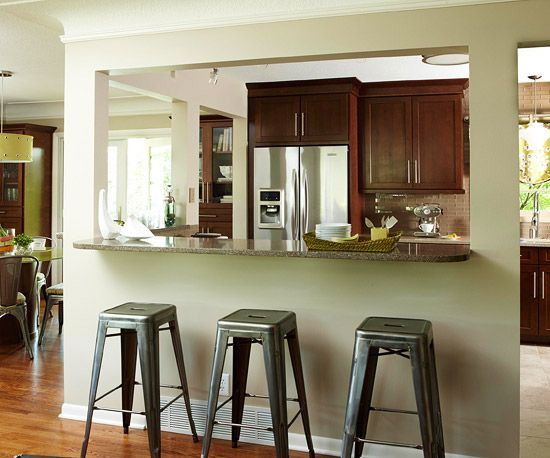
The kitchen is no longer just a space for cooking; it has evolved into the heart of the modern home, a hub for family activities and socializing. Do millennials even know what a dining room is? Just kidding - this one does! Despite the importance of the kitchen to the modern household, many homeowners overlook creative layout opportunities during their remodel, sticking to traditional designs that may not maximize the potential of the space.
Don’t be afraid to open up a wall or two (or four). Consider re-imagining your kitchen layout to create a more inviting and functional space. Think about how your family uses the kitchen and tailor the layout to accommodate those activities. That annoyingly narrow space between the island and the fridge that keeps causing you to bump your hip into the counter? That’s still going to be there even if the counter is quartz and the fridge is shiny new stainless steel. Even small changes in the floor plan can make a significant difference in the overall flow and atmosphere of the room. Remember, like the bathroom, you probably use the kitchen multiple times per day. If you’re already going through the trouble and expense of a remodel it may be worth the extra effort to customize your layout.
Mistake 4: Lack of Planning
Perhaps one of the gravest mistakes in kitchen remodeling is a lack of planning. In particular: leaving finish selections to the last minute. Neglecting to create a fully comprehensive plan can lead to delays, budget overruns, and disappointment with the final result.
Start your planning by selecting finishes early in the process. Create a detailed timeline that outlines each phase of the remodel, from demolition to the final touches. Budgeting is also a critical aspect; be realistic about costs and set aside a contingency fund for unforeseen expenses. A qualified general contractor can work directly with you or your interior designer to create a well-thought-out plan. This will serve as your roadmap, guiding you through each step of the remodel with clarity.
Mistake 5: Cheaping Out on Appliances
Your kitchen appliances are the workhorses of the space, and cutting corners on quality can have long-term consequences. While it can be tempting to allocate more budget to visible elements like countertops and cabinets, I highly recommend investing in reliable and efficient appliances.
Consider your appliances as long-term assets that contribute to the overall enjoyment and functionality of your kitchen. These could even see you through a subsequent remodel! Quality appliances not only last longer but also perform better, saving you money and frustration on repairs and replacements in the future. You don’t think you REALLY need a dishwasher until it stops working. Or perhaps worse, it kind of works but always leave 30% of the dishes not quite clean. Prioritize durability and energy efficiency to make the most of your investment.
Bonus Tip: Soft-Close Hardware for Cabinets
In the midst of a kitchen remodel, it's easy to get caught up in the grand decisions and overlook the finer details. One such detail that often goes unnoticed but adds immense value is soft-close hardware for cabinets. Whether you opt for custom cabinets or quality stock cabinets, incorporating soft-close features is a small investment that pays off in daily convenience.
Soft-close hinges and drawer slides prevent slamming, reducing wear and tear on your cabinets and ensuring a quieter kitchen environment. Even if you're working within a budget, many stock cabinets now come equipped with soft-close hardware, making it an accessible luxury that enhances the overall experience of your kitchen.
Prioritizing Your Kitchen Needs
Before diving into your kitchen remodel, take a moment to reflect on how you use this space. Understanding your priorities will guide your decisions throughout the process. Ask yourself:
How often do I cook, and what types of meals do I usually prepare?
Is the kitchen primarily a social space for family and guests?
Do I require ample storage for specific kitchen tools or appliances?
By answering these questions, you can tailor your remodel to suit your lifestyle, ensuring that the final result aligns with your practical needs and aesthetic preferences.
From maximizing storage to investing in quality appliances, each decision you make now will play a crucial role in your future enjoyment of your kitchen. By addressing these potential pitfalls and incorporating our tips, you can navigate the remodel process with confidence, and creating a space that exceeds your expectations.
If you're ready to kick-start your kitchen transformation, schedule a consultation with us to find out more about how we can help you create the kitchen of your dreams!


